
Today’s article is not at all going to go the way I had initially hoped. Hey yo, what’s popping, ladies and gentlemen? Welcome back to the channel, welcome back to the vlog! It’s great to see you guys. What’s been going on? What’s the latest and greatest? How’s everybody doing? Drop some comments below.
Guys, it has been almost two months since I’ve uploaded to YouTube, but like, what have you done over the last two months? It’s been nearly 60 days since I’ve uploaded. What is one absolutely incredible thing that happened to you over the last 60 days? You have to drop a comment below and let me know. I missed my YouTube fam so unbelievably much. Guys, I love y’all. I missed y’all. I’ve missed talking to the camera, which is a representation of all the incredible enthusiasts behind the lens.
I absolutely need to remind you that we are giving away the most insane setup for DDG 38 literally ever. It’s a 2023 F450, satin black over black paint. It’s got caramel interior, fully loaded from tip to top, and it’s got a 45 ft Keystone Raptor to boot. If you guys haven’t seen it, it’s DDG 38. I coined it “com” because it is just truly one of a kind, and it is such a badass setup that truly snaps your neck as you’re driving down the road. And you can actually win it with $50,000 cash. So if you guys want to check that out, click the link below, grab some gear, and you might be the next winner in the winner’s circle.

But, so now that’s been said, today’s is not at all what I was initially planning. My initial concept of design was to try to accomplish something that really hasn’t been done because my whole adage, my motto, my mantra lately is to really kind of stay in that lane of being your own self because everyone else is taken, right? Or similar branding. I’ve really kind of decided to take a left when everyone’s going right, to do my best to be unlike the rest. And really, that’s kind of like me as an individual and what it is that I want to accomplish in my life, but also just to embrace the fact that, like, truly, we are so unique in every single way, shape, and form. And we truly need to embrace who we are, what we’re good at, what we’re not good at, and where we want to improve.
Pretty much every setup has been done a gazillion times and back. One thing that I truly like to do is stay true to my roots, right? Stay true to my being, stay true to who I really am and who I kind of was when I started YouTube. So in that instance, I wanted to do something extra special and bring back a setup that is extremely familiar on the vlog. It’s a set of 355s, this square setup that you guys see right here. We’ve got them wrapped up on a set of JTX wheels. These things are absolutely sick. Big shout-out to Chris for making it happen. My plan was to do something really unique with the truck with this setup right here.
That being said, guys, do you see these little marks right here? Like that mark and that mark. Do you notice that the spacing of those marks happens to be very similar to the spacing of these treads right here? And do you happen to also see that these marks right here happen to be very indicative of the same tread pattern? All right, so here’s the deal. We’re still 14.5 inches wide, although we are mounted up on a 12-inch-wide wheel. These 355s are nothing to mess around with. So today, I’m going to be sharing with you guys all the things that we need to do to get this massive setup on this truck. And I guarantee you’re not going to want to miss the end of this, where we finally get these wheels up and mounted.
Some of you guys may cringe to see me take this brand new 2024 Denali Ultimate, which is effectively unscathed, and do what I’m about to do to it. So, viewer discretion is advised. If you get upset about modifying perfectly good objects to make them look absolutely badass, then you might be on the wrong YouTube channel. That right there—I don’t think I’ve ever actually shown on YouTube. And I want this to be actually helpful for people, so all jokes aside, I don’t really like to ruin nice things. I obviously work pretty hard for them. But the large fender mod on this truck is super simple. It’s basically cutting out this bolt-in bracket and deleting another one. So, you’re deleting two of the five, which means that you’re leaving three of them in place. There’s one right under here, and there’s one right back there.
This thing takes up a lot of our real estate. If we put this back in its place, we now have all of this room, right? So imagine that right here, that line is right there. All of this is effectively in the way to create the form and function benefit that we seek to achieve, or that I seek to achieve because I really try to maximize form and function. I like wide, but I also really like being able to turn, and I’m not really willing to sacrifice wide for no turn. But now we need to work on this. I have a really nice little workbench over there, but I’m not going to get fancy with it because fancy is really not necessary. You can do this any way that you want.
So here’s what was, and here’s what is. That is literally all we are actually going to take into our application because now we have a whole bunch more real estate. And of course, I was really sloppy with the grinder wheel. You can see that I nicked here, I nicked here, but I’m not too worried about it. I’m planning on doing something in the future with these anyway, so they may or may not look like this. But now, if we throw this back on, you can see that there are the Nitto marks, and now, once that’s removed, we have all that real estate to play with.
The same thing kind of goes on the front bumper side. In all reality, I’m going to space this bumper out—not going to do that tonight—but I always trim the valance regardless because this big thing is kind of like the backside—it compromises real estate. So, I typically try to take this and just kind of notch it down and give it a nice little pass-through, and that is what I’m going to do right now.
Like any true enthusiast would do, we are going to go out of our way to do some extra work to mount this big thing up here just to see if we have to re-align it. Okay, they do look freaking sick on there though, don’t they? Oh my goodness. Now, if my calculations are correct, this is not going to work. Oh man, look at that! That is freaking close! We do not need that much lift to get that to work on the front. A little bit of a different story there—we’re going to have to space the bumper out, but I unfortunately don’t have the hardware I need. But you can see, it’s really close.
Alright, now I may have done this a time or two, or three, or ten. I was kind of a little bit optimistic that if I was running a 22×12 with a 355 and not a 14 wide, which was kind of my thing for a while on a non-leveled setup, but unfortunately, that’s not going to be the case. And I kind of suspected that, so I may or may not have prepared myself. So ladies and gentlemen, we’re going to be throwing on a set of Cognito upper control arms. I have Cognito keys and King shocks to go with it. I wanted to do this stuff regardless, but I didn’t really want to crank the truck up, per se. Now, just because I’m working tonight, I’m not going to be doing the keys. I freaking hate dealing with keys—they are the absolute worst in the entire world. I’m going to actually detour the keys that are factory in the truck just to make this stuff a little bit easier to mess around with, but I’m not going to be installing these tonight because I just do not feel like it. Rather, I’m going to be focusing my attention on the upper control arms and the King shocks. Let’s get into it.

Alright, ladies and gentlemen, so we are cruising right along. I kind of got a little ahead of myself last night. One of the things that I find myself guilty of is my ambition sometimes outweighs my willingness to film because I just want to get it done since I’m on some sort of timeline. So, I wanted to give you guys a quick little update right now. Got the bumper off, the grille is off, these little canards from the headlights are off, and we are actually just about to space the bumper. I wanted to show you guys this process because it does help substantially in creating more room and real estate in the front end.
Fender extension here, as you guys can see, we got this thing all ripped apart. Broke some clips in the process—they put entirely too many clips on these things. But I’m about to take these brackets off right now. We’ve got the final, I think it’s a 16
or 15 mm on there. The factory ones are off. We have this new hardware right here that’s going to be replacing it, as well as some spacers. So, I actually have a whole bunch of these washers laying around—these are the ones that I’m actually going to use. And this equates to about 5/8 of an inch. We’re actually going to take these spacers and we are going to put them in between the frame mount, the frame rail, and the actual mounts themselves. That way, we space this bumper forward and give ourselves the room we need to run this freaking absolutely sick-looking setup.
By the way, those King shocks and Cognito look fantastic. I have a story about those that I’ve got to tell you guys here in just a minute, but I want to get this done first.
Now, of course, you mean to tell me that the instant that something happened that was completely unplanned and candid on the vlog—that has never happened to me across all of the Duramax trucks that you guys have seen me own and modify over the years—it was absolutely insane. First of all, it looks absolutely so unbelievably sick this way. I’m not even going to lie—sicker than I ever anticipated.
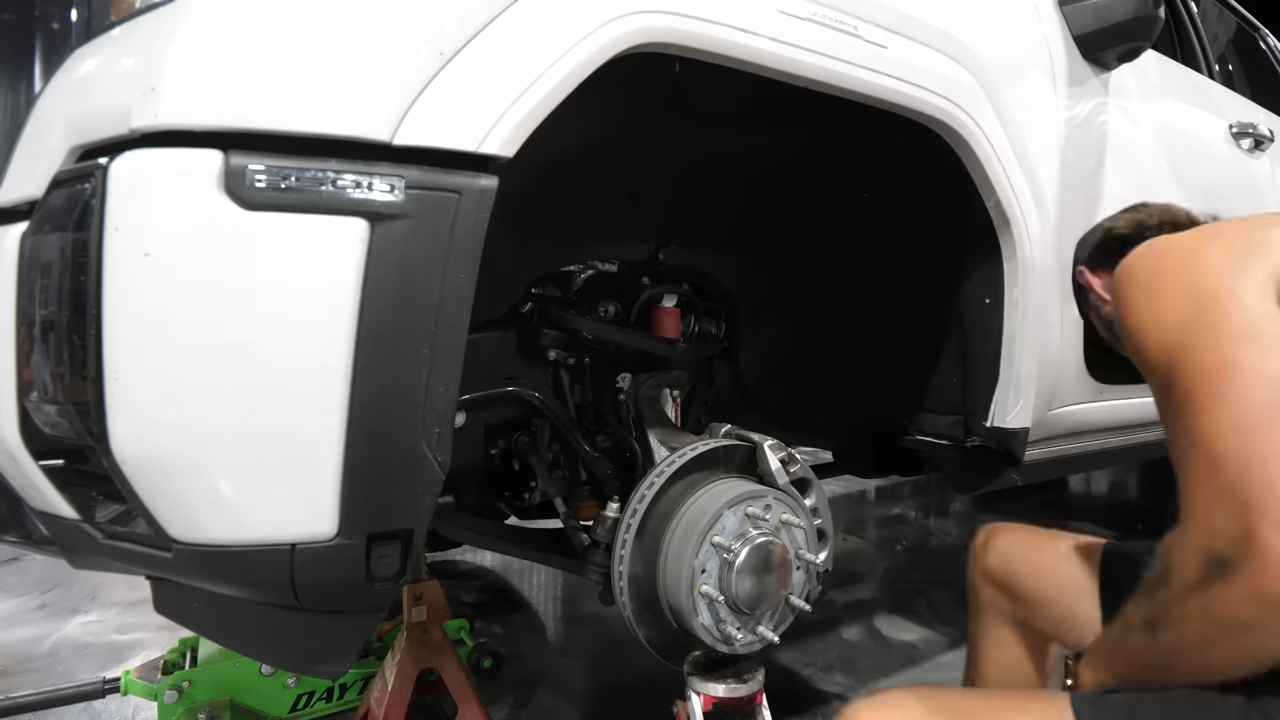
As I was buttoning up this setup, I was adjusting the torsion bolts. Now, for those of you guys that don’t know, these trucks actually have a torsion rod that runs from the center of the chassis over—it’s that rod right there that is actually connected to the lower control arm. And as you crank a bolt, it pushes a key that puts pressure on the rod and forces the wheels down. The Duramax guys with the independent front suspension have the ability to use these bolts in or against their favor. But I’ve done this always and forever, so I was doing as I only knew to do until I was basically reminded why I shouldn’t do it.

I was adjusting the ping key on the truck, full weight. It was stupid, it was dumb, it wasn’t really thought out, but I’ve done it a gazillion times. I grounded because as I was cranking it in, the threads inside of the nut actually snapped. Now, the bolt did not come rocketing out or anything like that, but it was a pretty scary moment because the entire front end of the truck went from essentially all the way up to all the way down very, very quickly. Now, luckily, I had the wheel on and everything was fully, fully refastened, but it was still a very scary moment.
Now we’re just going to call this the dumped ultimate Denali. And honestly, now that I’m seeing it all the way down, I know it probably is going to ride out with those massive King 2.5 shocks, but unfortunately, it does not turn at all. We got the bumper spaced—you kind of can’t even tell, but if you have a trained and experienced eye, you can always look at the bumper-to-fender gap difference. When there’s a gap right there, you can tell that the bumper is spaced forward, but fortunately, the design and the grille on how it’s just not really all that realistic. I mean, look at the front end and how absolutely insanely menacing that looks.
I mean, truthfully guys, this truck already looks incredible. We are going to have to do some fixing, and I already ordered that replacement part from General Motors, so that should be in any day. That being said, ladies and gentlemen, we are going to sign off on today’s article. Thank you, as always, for watching the article. If you haven’t already, give it a big ol’ thumbs up. It’s great to see you guys again on YouTube—it’s always a pleasure. And I’ll see you in the next upload.This version retains all the original content but organizes it for easier reading and clearer flow.

